Getting Ready for the 2024 Total Solar Eclipse

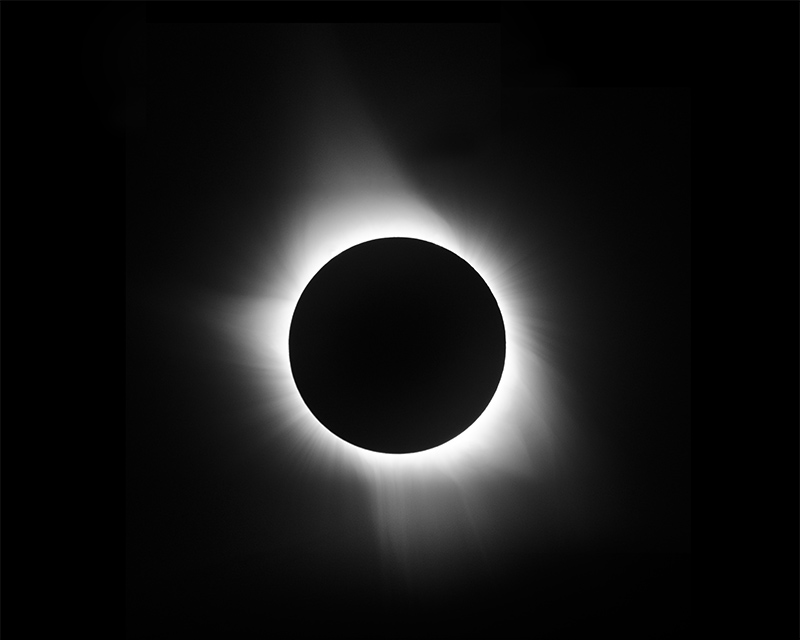
The 2017 total solar eclipse, as seen from Clarksville Tennessee, was captured with my telescope and camera.

In only a few months, on April 8, 2024, an awe-inspiring total solar eclipse will be visible from an area that spans from Mexico to Canada’s east coast. To make the most of this incredible experience, it is important to plan ahead.

When the moon passes directly between the Earth and the sun, a total solar eclipse occurs. People who come to the “path of totality” will see the sun gradually covered by the moon, shrinking it to a sliver and then completely hiding it for a few short, yet remarkable minutes. During this time, the sun’s outer atmosphere, called the corona, can be observed, and the land below will be dimmed to levels close to nighttime.

I have had the fortune to observe several eclipses, both solar and lunar, over the years but nothing really prepares you for a total solar eclipse, even if you have seen them before.

In 2017, the “Great American Eclipse” provided millions of Americans with their first opportunity to witness a solar eclipse, and its impressive display of nature left many with a newfound fascination for the celestial phenomenon. This eclipse also prompted those who were unable to observe it to make sure they don’t miss the next one in 2024.

In 2017, an eclipse crossed the United States, providing up to two and a half minutes of totality along its path. For the 2024 eclipse, viewers will be treated to a longer period of totality, up to four minutes, and more people will have the opportunity to view it. Over 12 million lived within the 2017 eclipse path, while a projected 32 million will live within the 2024 path. This path will span from the west to east coasts, including cities such as Dallas, Little Rock, Indianapolis, Cleveland, Buffalo, San Antonio, Austin, Cincinnati, and Montreal. Due to the millions within a few hours drive, the 2024 event could be one of the most observed celestial events ever.

In order to make the most of the eclipse experience, I have gathered the following four steps from my own experience and from consulting with professionals.

Do you know of any good places to observe a solar eclipse?

The 2024 total solar eclipse will be visible across Mexico, the United States, and eastern Canada, as illustrated in this map showing the moon’s shadow path: Total Solar Eclipse MapThis eclipse can be seen in the areas shown on Greatamericaneclipse.com.

At the time of an eclipse, the Earth and moon are both in motion, causing the moon’s shadow to move across the globe in a long, slim path of totality. Those residing outside of this path will witness a partial eclipse instead of a total eclipse, and the difference between the two can be likened to night and day. To ensure optimal viewing of the eclipse, one should try to get inside of the path of totality. Many resources are available to help with this, such as the Great American Eclipse website which offers exact start and end times for the eclipse for cities along the path. Additionally, state-by-state maps can be found at the National Eclipse site, and Eclipse2024.org provides an interactive map of the entire eclipse path.

Don’t delay in making your accommodation reservations; many lodgings along the eclipse path are quickly filling up, and it appears there is already price gouging occurring–like it did in 2017. If you’re in a bind, you can rent a room outside of the path and drive in for the eclipse, though it is advised to arrive the day before. According to Gary Seronik, a consulting editor with Sky & Telescope magazine, “You don’t want to be that guy in the station wagon, with the kids in the back, stuck in traffic while the eclipse is happening.” Staying overnight after the eclipse has ended is also recommended, as the worst traffic is always after totality. The eclipse will occur on a Monday, so consider taking a long weekend. Michael Zeiler, co-developer of the Great American Eclipse website, suggests that people should be “reasonably self-sufficient. Bring your own food, bring your own water and keep the gas tank filled up. Maybe take a sleeping bag just in case.”

You don’t have to be at a big public event to enjoy the eclipse. I had a wonderful time in 2017 at the Old Glory Distillery who was having a private event. You can read about it here. I saw something about it online and called ahead to reserve a spot.

I also had a lot of fun at a rest area on the side of a highway while viewing the transit of Venus in 2012 which you can read about in my article on it. It was not crowded and there were only a few of us there.

What types of atmospheric conditions should one avoid during the solar eclipse?

The 2017 eclipse occurred in the late summer, while the 2024 eclipse is in springtime and may be clouded over. The best chances of clear skies are in Mexico, with Texas having the next best chances – approximately a 50-50 chance. Then, prospects become worse the farther northeast you go. According to Seronik, the best option in the US is to be as close to the Mexican border in Texas.

Maintaining a positive attitude is essential when chasing an eclipse, which is both a gamble and an adventure. Trish Erzfeld, chair of the Missouri Eclipse Task Force, encourages people to not worry about the weather. No matter the sky conditions, the landscape will still darken considerably during totality. Even if it is cloudy, the sights and sounds of the eclipse will be remarkable, with animals exhibiting strange behaviors. Erzfeld suggests that people should pay attention to the animals, such as cows, horses, birds, and crickets, as they will respond to the changing light. Although it may rain, it will still be a unique experience.

What do I need to have in order to observe the solar eclipse?

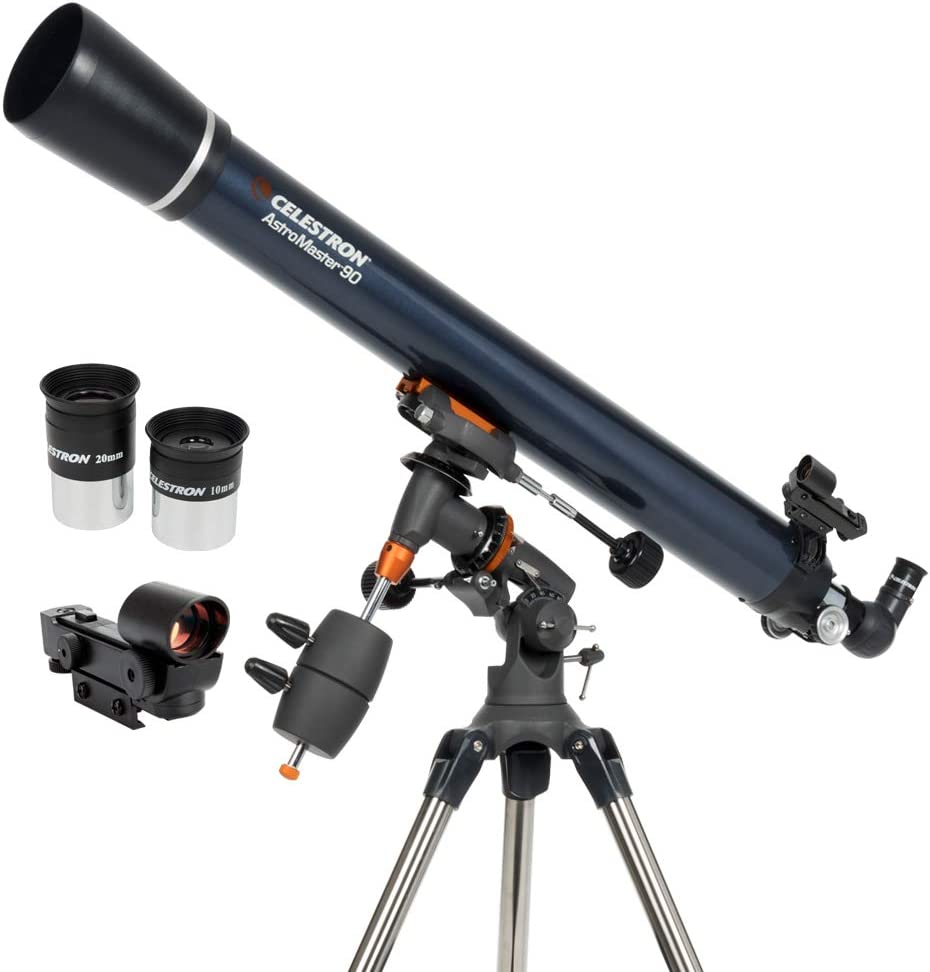
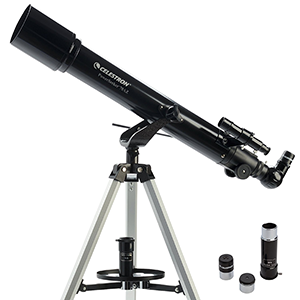
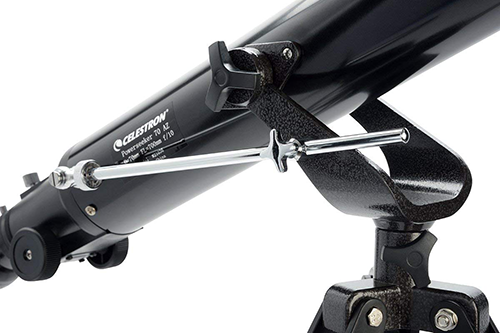
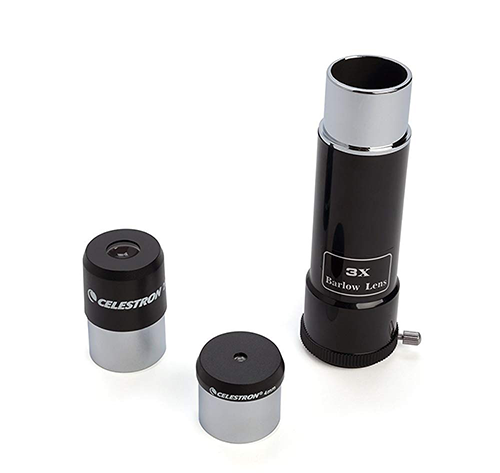
You can use eclipse glasses, or if you want a better view you can get a solar filter for your binoculars or telescope.

Solar viewing glasses

On a clear day, the drama will start an hour before the totality as the moon gradually takes a bigger “bite” out of the sun. It is essential to utilize glass or Mylar eclipse viewers from a reliable manufacturer to observe the partial phases safely; you can refer to the American Astronomical Society’s guide to find out which viewers are trustworthy. You can take pleasure in the partial phases of the eclipse which move along slowly, however, the last few minutes before totality will seem to pass by quickly. Also, take a moment to witness the changes in the landscape as colors become muted and shadows become sharper a few minutes prior to totality. Then, the moon will cover the sun completely, making it as dark as night or a deep twilight. Venus, along with other bright planets and stars, will be visible. An extraordinary sight, exclusive to total eclipses, will capture your attention: the sun’s outer atmosphere, the corona, will come into view, appearing as a feathery ring of light around what looks like a gap in the sky, where the sun used to be.

No amount of anticipation can do justice to the grandeur of a total solar eclipse. It is a sight unlike any other and the most beautiful phenomenon one can view in the heavens. It is also amazing with the unique shadows cast on the ground, and unique sounds that insects and animals make that you will never experience at any other time in your life.

At the point of totality, you can take off your eclipse viewers and look at the eclipse with your own eyes; as long as the sun is totally blocked out by the moon, you can do so. Even binoculars are suitable for viewing. Just keep in mind: As soon as totality has finished, put the binoculars down and put your eclipse viewers back on.

Suggestions for Photographing the Eclipse

How to take pictures of an eclipse book

Veteran eclipse chasers are often quick to advise that one should take the time to sit back, relax and simply enjoy the experience, as the few minutes of totality will pass quickly. While I did get some nice images at the past several eclipses I attended, I always make sure to have them automated as much as possible. There is simply no substitute for looking around at what all is going on and taking it in.

It’s true that we live in a picture-oriented world–which means you might feel the urge to capture a photo of the eclipse. Smartphone cameras have their restrictions, but they are still helpful during an eclipse. I recommend changing the setting to video mode and recording a few minutes before totality. Point your phone towards you and your friends and rotate it vertically to include both the eclipse and the ground. You may be surprised to find that the audio track from the video is as interesting as the video itself.

If you are looking to capture the moment of totality with a DSLR and a telephoto lens, I suggest using a remote control or intervalometer so that all your attention can be focused on the eclipse. Additionally, a sturdy tripod is essential. If your camera has the capability, auto-bracketing with one push of the shutter button can produce multiple images with different exposure times, thus increasing the chance of getting a great shot. The required exposure settings change dramatically as the eclipse gets closer to totality.

It is important to familiarize yourself with your camera’s features before the eclipse. Lastly, never look through the viewfinder or point the telephoto lens at the sun without a solar filter, as it could be damaging to both your camera’s sensor and your eyes.

Keep in mind, the extraordinary close-up pictures of the totally blocked-out sun that you come across in magazines are usually taken by specialized photographers with more practice and higher-quality equipment than the average person with a camera. This doesn’t mean you won’t get a great image that you can look back on with great memories, you just may not get what you see in the magazines.


Share this post! Facebooktwitterredditpinterestlinkedintumblrmail

The Enigma of Wolf Rayet Stars: Understanding Their Evolution and Characteristics

The Wolf-Rayet Star WR 124

The Wolf-Rayet Star WR 124

‍I have always been fascinated by the many mysteries of the universe, that is one of the driving reasons I became an amateur astronomer. One of the most intriguing phenomena that I have encountered is the Wolf-Rayet star. These stars are some of the most massive and luminous objects in the universe, yet they are also some of the most enigmatic. In this article, I will attempt to pass on a little of the mystery and grandeur that fascinates me so much.

Introduction to Wolf-Rayet Stars

Wolf-Rayet stars are a type of massive stars that are named after their discoverers, French astronomers Charles Wolf and Georges Rayet. These stars have exhausted their lighter elements and are characterized by their strong stellar winds and high luminosity. They are also known for their high temperatures and relatively short lifetimes. Wolf-Rayet stars are believed to be in a transitional phase between the main sequence and supernova stages of stellar evolution.

The first Wolf-Rayet star was discovered in 1867, but it was not until the early 20th century that astronomers began to understand their significance. Today, we know that Wolf-Rayet stars are some of the most important objects in the universe, playing a key role in the evolution of galaxies and the formation of new stars.

Discovery and Classification of Wolf-Rayet Stars

Wolf and Rayet observed certain stars with broad emission lines that were not present in other stars. These emission lines were believed to be due to strong stellar winds.

Since then, astronomers have classified Wolf-Rayet stars into three main types based on their spectra: WN, WC, and WO. The WN type is characterized by nitrogen-rich emission lines, while WC stars are carbon-rich and WO stars are oxygen-rich.

Nitrogen-rich Wolf Rayet stars are the most common. Carbon-rich and Oxygen-rich Wolf Rayet stars are relatively rare.

In addition to the spectral classification of Wolf-Rayet stars, astronomers also classify them according to their luminosity. There are two main categories: supergiant WR stars and dwarf WR stars. Supergiant WR stars are some of the most luminous objects in the universe, while dwarf WR stars are relatively faint and short-lived.

The Evolution of Wolf-Rayet Stars

These stars have a relatively short life compared to other types of massive stars. They are believed to be in a transitional phase between the main sequence and supernova stages of stellar evolution. As Wolf-Rayet stars age, they lose mass through their strong stellar winds. This mass loss can cause the star to evolve into a red supergiant or a luminous blue variable star. Eventually, the star will run out of fuel and undergo a supernova explosion.

The exact evolutionary path of a Wolf Rayet star depends on its initial mass and composition. Higher mass stars are more likely to evolve into Wolf Rayet stars, and nitrogen-rich Wolf Rayet stars are more likely to evolve into red supergiants, while carbon-rich Wolf Rayet stars are more likely to evolve into luminous blue variables.

Characteristics of Wolf-Rayet Stars – Mass, Temperature, Luminosity

Wolf-Rayet stars are some of the most massive and luminous objects in the universe. They are typically more than 20 times as massive as the sun, and they can be up to 100,000 times as luminous. Wolf Rayet stars are also known for their high temperatures, which can reach up to 200,000 Kelvin.

One of the most interesting characteristics is their strong stellar winds. These winds can be up to 10,000 times as strong as the solar wind, and they play a key role in the evolution of the star. The stellar winds of Wolf-Rayet stars can also create complex structures in the surrounding interstellar medium.

Types of Wolf-Rayet Stars – Nitrogen-Rich, Carbon-Rich, and Oxygen-Rich

As mentioned earlier, there are three main types of Wolf Rayet stars: nitrogen-rich, carbon-rich, and oxygen-rich. Nitrogen-rich Wolf Rayet stars are the most common, and they are believed to be in a transitional phase between the main sequence and red supergiant stages of stellar evolution. Carbon-rich Wolf Rayet stars are relatively rare, and they are believed to be in a transitional phase between the main sequence and luminous blue variable stages of stellar evolution. Oxygen-rich Wolf Rayet stars are also rare, and they are believed to be in a transitional phase between the main sequence and Wolf Rayet stages of stellar evolution.

Importance of Wolf-Rayet Stars in the Universe

Wolf-Rayet stars are some of the most important objects in the universe as they play a key role in the evolution of galaxies and the formation of new stars. Wolf-Rayet stars are believed to be the progenitors of many types of supernovae, including Type Ib and Type Ic supernovae.

The strong stellar winds of Wolf Rayet stars can also create complex structures in the surrounding interstellar medium. These structures can include nebulae, bubbles, and shells. These structures can help astronomers to understand the processes of star formation and galactic evolution.

Observing and Studying Wolf-Rayet Stars

Studying Wolf-Rayet stars can be challenging, due to their high temperatures, strong stellar winds, and relatively short lifetimes. However, recent advances in telescopes and instrumentation have made it possible to observe and study these objects in detail.

One of the most important tools for studying Wolf-Rayet stars is spectroscopy which allows astronomers to analyze the elemental composition of a star, as well as its temperature and luminosity. Spectroscopy can also be used to study the complex structures in the surrounding interstellar medium.

The Top Five Visible Examples of Wolf-Rayet Stars

Gamma Velorum

Gamma Velorum is a binary star system located in the constellation Vela. The primary star is a Wolf-Rayet star, while the secondary star is an O-type main-sequence star. The Wolf-Rayet star is losing mass at a very high rate, and its stellar wind is colliding with the wind from the O-type star, producing X-rays.

WR 134

WR 134 is a Wolf-Rayet star located in the constellation Cygnus. It is one of the brightest Wolf-Rayet stars in the sky, with an apparent magnitude of 6.19. WR 134 has a very strong emission in the blue and ultraviolet regions of the spectrum, and its spectrum shows broad absorption lines that are shifted to the red end of the spectrum.

WR 136

WR 136 is a Wolf-Rayet star located in the constellation Cygnus. It is a member of the Cygnus OB2 association, which is one of the most massive associations of young stars in the Milky Way galaxy. WR 136 has a mass of about 25 solar masses and is losing mass at a rate of about 10^-5 solar masses per year.

WR 137

WR 137 is a Wolf-Rayet star located in the constellation Aquila. It is a member of the Aquila OB1 association, which is a group of young stars that are about 500 parsecs from Earth. WR 137 has a mass of about 23 solar masses and is losing mass at a rate of about 10^-5 solar masses per year.

WR 140

WR 140 is a binary star system located in the constellation Cygnus. The primary star is a Wolf-Rayet star, while the secondary star is an O-type main-sequence star. The two stars are very close together and orbit each other with a period of about 7.9 years. The Wolf-Rayet star is losing mass at a very high rate, and its stellar wind is colliding with the wind from the O-type star, producing X-rays and radio emissions.

Challenges in Studying Wolf Rayet Stars

Studying Wolf Rayet stars presents many challenges for astronomers. One of the biggest challenges is their relatively short lifetimes. Wolf Rayet stars typically live for only a few hundred thousand years, which is a relatively short time in astronomical terms.

Another challenge is the strong stellar winds of Wolf-Rayet stars. These winds can create complex structures in the surrounding interstellar medium, which can make it difficult to study the star itself by obscuring it from direct observation.

Finally, the high temperatures of Wolf-Rayet stars can also be a challenge for astronomers. These stars are so hot that they emit most of their radiation in the ultraviolet and X-ray regions of the spectrum, which can be difficult to observe from Earth.

Future Research on Wolf-Rayet Stars

Despite the challenges, there is still much to be learned about Wolf-Rayet stars. Future research will focus on understanding the complex processes that drive the evolution of these stars, as well as the role that they play in the formation of new stars and galaxies.

New telescopes and instrumentation will also play a key role in advancing our understanding of Wolf-Rayet stars. The James Webb Space Telescope, for example, can observe these objects in greater detail than ever before.

Conclusion

Wolf-Rayet stars are some of the most fascinating objects in the universe. They are massive, luminous, and enigmatic. They play a key role in the evolution of galaxies and the formation of new stars. Studying these objects presents many challenges, but advances in technology are making it possible to observe and study them in greater detail than ever before. As we continue to explore the mysteries of the universe, Wolf-Rayet stars will undoubtedly continue to play a key role in our understanding of the cosmos. Not to mention, trying to observe them is just plain fun!


Share this post! Facebooktwitterredditpinterestlinkedintumblrmail

The New Observer 90mm Refractor – Orion Destroyed Their 90mm Beginner Scope

The new Orion Observer 90mm refractor is the replacement for the Orion Astroview 90mm refractor telescope that I have recommended for years as the almost-perfect beginner telescope for newcomers to the hobby. That has abruptly come to an end after I got my hands on their new telescope.

Orion Observer 90mm refractor

General review of the Observer 90mm

One week with the new Orion Observer 90mm and I had had enough and returned it. The reason? Plastic.

The Orion Observer 90mm is now a huge gob of plastic parts held together by a few pieces of metal. There is enough metal to do a pretty good job of holding those plastic bits together, but just barely.

Observer 90mm focuser

Let’s start with the part that just chapped my….well, hindquarters, the focuser. Now a lot of telescopes these days have a plastic, or mostly plastic, focuser. The problem is that as far as I can tell, it is virtually all plastic and that causes a few problems on the Observer 90mm.

The first of the Observer 90mm’s plastic focuser issues is that it is not smooth. The view is fairly smooth as you rack in and out, but the focuser itself is not. You can feel every gear, and it is annoying. Particularly since I do not have another telescope that rough. Not even the Gskyer telescopes I bought for my new GskyerTelescopes.Net website. Yep, the Observer 90mm focuser is worse than the one on the $50, 70mm Gskyer.

To add insult to injury, the two metal screws in the Observer 90mm‘s focuser tube that tighten the plastic diagonal, are run through the plastic threads in the plastic focuser tube. You know how well that is going to work, right? You guessed it, they will strip out and then you won’t be able to tighten your diagonal anymore.

This leads me to the next issue with the Observer 90mm, the plastic diagonal with metal screws. OK, this is not that uncommon today and can easily be replaced with a nice metal diagonal for less than $20 but still, for a telescope at this price point, they couldn’t have included it?

Orion includes two eyepieces with the Observer 90mm to put into your plastic diagonal, neither of which have their name on them. This is the first telescope I have received that had eyepieces but they were not Orion branded. How bad do things have to get before you won’t even put your name on a product?

The Vixen rail on the new Observer 90mm

On the bright side, the new Orion Observer 90mm telescope now attaches the telescope tube to the mount using a standard Vixen rail. This has been a pet peeve of mine for years as the previous model, the Atroview, and the model before that, the Skyview, both used a proprietary bolt-on attachment. Yes, you could get a conversion kit from a 3rd party, but what a pain. I always thought that if they used a rail they could use one mount for all their telescopes in that range and make them easy to swap.

What do I know?

Unfortunately, that is all the good news I have for you, at least I put it in the middle to break up this rampage against Orion’s new Observer 90mm.

The telescope tube of the Observer 90mm is held to the new Vixen rail by a, wait for it, plastic clamp. I fully expect this clamp to fail and leave you with a telescope you can not longer attach to your mount without a lot of glue or duct tape (just kidding on the duct tape, maybe).

Orion's new mount for the Observer 90mm

One thing I was really excited about was the new mount that they put the Observer 90mm on. While the Astroview’s mount was far better in the field than it looked, it paled to the old Skyview Deluxe mount before it. I was really hoping that they had returned to a nicer mount with the Observer. My hopes were dashed, again.

While the new mount for the Observer 90mm looks beefy, it is, in fact, lighter than the previous mount. It also is no more stable. I know, it looks like twice the mount, but it isn’t. I am not sure how they pulled that one off. To make it even worse, it is substantially stiffer and harder to move around when unlocked (or using the slow-motion controls). Even balancing the scope is more difficult because completely unlocked the scope will not swing, even when massively unbalanced. This means you have to balance the Observer 90mm by feel which is not a big deal for an experienced user, but for a beginner that can be a challenge.

Moving down to the Observer 90mm’s tripod legs you will immediately note that they are missing the rubber tips on the bottom. This means when the telescope is on something smooth, it tends to scoot and slide around. When I put it in my living room with hardwood floors I could literally slide it around the room with the push of one finger. Annoying at best.

This also affects stability when you are on any kind of smooth surface as the legs on the Observer 90mm will tend to spread and bow. This happens on wooden decks, polished concrete, and I would assume tiles such as around pools and hot tubs. The old Astroview and Skyview models did not have this problem.

I also think the tripod is a little flimsier than the Astroview model as well as being a little shorter. This makes the whole assembly less stable than it could be with a few minor upgrades from the factory (better legs, rubber tips, better locks, etc).

Orion Observer 90mm finderscope

Another place they backed up with the Observer 90mm is the finder scope. In the last two iterations of Orion’s 90mm refractor, this was a standard dovetail mount, now it is a cheap, and plastic, two-bolt mount. Yes, it works, but it also seriously limits you to what you can attach here without an adapter.

It honestly seems that everywhere I look on the Observer 90mm, there is a downgrade of some sort, except the price. They managed to keep that the same.

You might be thinking they had to lower the quality of the Observer 90mm to keep the price the same, and I might be tempted to agree with you, except when you look at their competition. I just had, literally an hour ago, a Celestron Astromaster 90mm EQ refractor delivered, brand new in the box. From everything I have read, I expect it to be my new recommended beginner telescope.

Stay tuned here and on my YouTube channel for reviews of the Celestron scope. Hopefully, it will be an improvement over the Orion Observer 90mm and it is currently $80 or so cheaper which makes it a no-brainer if it passes muster.

Viewing with the Orion Observer 90mm

All of the negative stuff out of the way, how does the Observer 90mm perform when viewing out in the field? The short answer is, not bad at all.

Optically it seems no better or worse than the ones before it. In all fairness, you would have to try pretty hard to mess up something this simple so I am not really bragging on the scope, just saying that where they did seem to goober the rest of the scope, they appear to have left the optics mostly alone.

I am not sure it has much in the way of coatings as reflections are clear with no color cast and that is rare in coated optics at this price range. It does not seem to change the views though. There seems to be no more or less of a magenta halo around bright stars or the moon.

Speaking of the moon, one of my favorite targets with any 90mm refractor, the views are nice and crisp with good detail as long as your seeing conditions permit. It has been stupid-hot here in Texas lately so the one week I spent with the Observer 90mm had some terrible seeing conditions. The scope performed no worse than my Orion Astroview or Orion Skyview Deluxe though, so that is something.

I did really hate the stiffness of the Observer 90mm mount though. It and the focuser really detracted from otherwise nice viewing sessions.

Conclusions on the Orion Observer refractor

If you bought the Orion Observer 90mm, and you are within your 30 days, return it. There are better options.

My first recommendation for a replacement is to see if you can find an old stock or used Astroview 90mm refractor, or even better, a Skyview Deluxe 90mm refractor if it has been well cared for. All of these are currently (July 2022) available on eBay. I would even pay the same price for a good used Astromaster as what Orion is asking for a new Observer 90mm. It really is that much of a better telescope.

The Celestron Astromaster 90mm, a great alternative to the Observer 90mm

If all that fails, and from every indication so far, I would look at the Celestron Astromaster 90mm EQ as a good option for less money. I will have more information on that later, but just moving the unopened box from the front porch to my office tells me it is a seriously more substantial product than the Observer 90mm.


I hope you enjoyed this Orion Observer 90mm review!


Share this post! Facebooktwitterredditpinterestlinkedintumblrmail

New Gskyer Telescope Website to help beginners

Recently, a Gskyer telescope manual has become one of the most sought-after things in beginner astronomy. Quite a few people have asked me for help with their new scope. The actual Gskyer telescope website has no helpful information that I could find. The few websites that seem to turn up when people are looking for a Gskyer telescope manual are click-bait websites just trying to make money off of them without providing any kind of real help.

I always try to help when someone asks, particularly beginners because I know from personal experience how frustrating it can be to have a telescope and not be able to use it. This led me to a thought, what if I could provide some targeted help to these people? The Gskyer telescopes seem to be selling well on Amazon so there are probably a lot of people who need the information. How can I help them get it?

Launching my own informational Gskyer website, GskyerTelescopes.Net, was my answer.

Visit my new Gskyer telescope website at GskyerTelescopes.net

My goal is to make this new Gskyer telescope website a one-stop repository of pretty much anything the budding astronomer with a Gskyer telescope might need. From how to assemble your telescope, how it works, accessories that come with it, new accessories you can add, and detailed information on how to use your new friend are all included. I provide a variety of ways a visitor can find help including:

  • Text
  • Images
  • PDF files
  • Videos

So what is available on this new Gskyer telescope website?

Included are reviews, how-tos, and suggestions for all the current models of Gskyer telescopes available including the AZ60350, AZ70400, AZ80400, AZ90600, and 130EQ. This covers everything from their little “travel” desktop refractor all the way to their “professional” 130mm reflector on an EQ mount.

Unlike a lot of websites out there, I actually purchased or borrowed every telescope that Gskyer made and used it. This allows me to provide first-hand accounts of things to watch out for, how things work, and how they compare to not only each other but to other manufacturers’ offerings. You will get to watch me in the videos play with each and every single one, and all the accessories too.

All of this really made me realize just why so many people are scouring the internet looking for a Gskyer telescope website, or some form of information. There is virtually nothing included with the telescopes other than a one or two-page assembly guide. That simply is not enough for any telescope, let alone their 130EQ which is a 130mm Newtonian reflector on an equatorial mount.

I use a lot of video on my new Gskyer telescope website

I am currently just putting together my new Gskyer telescope website so don’t be too critical. If you have suggestions on information I can provide that will be helpful, or see something that doesn’t work, let me know. You can also pitch in and lend a hand, I am happy to take articles and more about Gskyer telescopes, just contact me using the “Contact Me” link at the top of either this website or GskyerTelescopes.net.

I hope you come visit my new Gskyer Telescope website!


Share this post! Facebooktwitterredditpinterestlinkedintumblrmail

Large expansion of my YouTube channel!

I have been busy expanding my Youtube page at https://www.youtube.com/c/AllanHall creating a ton of new content in my renovated video studio. Current work includes quick start guides, product reviews, and general information/tutorials. You should come by the channel and take a look!

Some of my new videos include:

With a huge list of titles currently in the works you are sure to find interesting ones for you. Check them out and let me know what you think. If you have any suggestions, or a topic you would like to see covered, leave me a comment and let me know. I will do my best to answer any question, and produce requested videos when I can.

Be sure to subscribe to the channel and click the notification bell to be one of the first to watch new content as I release it!


Share this post! Facebooktwitterredditpinterestlinkedintumblrmail

Add your own articles to Allans Stuff!

Do you have a story, how-to, review, or just something fun to share about astronomy/astrophotography with our thousands of visitors every month? Want to tell everyone about the furry little critter that visited you at the dark site, what you think of the new version of Pixinsight, how you captured that tiny slice of a young moon, or how much fun you had the other night doing the Messier binocular challenge? Now you can!

Simply visit https://allans-stuff.com/user-submissions/ and fill out the form. I will read it, and assuming it is the awesome article I know it will be, I’ll approve it and it will be immediately displayed on the blog complete with pictures if you want to upload them. Images can be up to 1500 x 1500 in size and you may include up to 5.

I also welcome clubs to post about upcoming events, lectures, and more!

This feature is for people to share their experiences and love of astronomy and astrophotography related subjects, not for people to make money off my website. Any links to products, services, or competitors are subject to deletion or modification at my sole discretion. Purely commercial spam will be deleted. All posts are held for approval. 

Vendors who would like to post about new products or services will need to visit https://allans-stuff.com/contact-me/ and get permission before posting.

Go ahead, give it a try!


Share this post! Facebooktwitterredditpinterestlinkedintumblrmail

Celestron Powerseeker 70AZ telescope review

The Celestron Powerseeker 70AZ is frequently a top recommendation when people ask me what telescope they should get their kids as a first telescope. Let’s find out why.

Celestron Powerseeker 70AZ telescope

Their First Telescope

That first telescope is much more important that most parents realize as it can help foster an interest in astronomy and science in general, or completely destroy the child’s interest. You probably wonder how that could be, and that is an excellent question.

Let’s look at this a different way; assume your kid wanted to play little league baseball. You went out and bought them a glove and a ball but when it came to the bat you bought one of those foam bats you can hit people with and not hurt anyone. Every time they tried to hit a baseball, the bat would simply flex and never actually make the baseball do anything. Since they never got a hit, always struck out, they would quickly loose interest and give up the game.

Who wants to play a game where you never even have a chance of winning no matter how hard you practice and try? No one, that’s who.

So now let’s switch to astronomy; you buy them a great book on astronomy and a cool map showing where some amazing objects are, then you give them a telescope that even when used by a professional could not identify a car across a football field much less the planet Jupiter in the night sky. It wobbles, it’s blurry, and it is extremely hard to navigate. What do you think their reaction would be? 

The good news is that you don’t have to spend a fortune to get a reasonable telescope that will keep them interested, and this telescope is one of those.

The Celestron Powerseeker 70AZ

The Celestron Powerseeker 70AZ telescope is a refractor telescope with a 70mm aperture on an alt/az mount and is pretty well made for it’s price of around $80. A large part of the telescope and mount are actually metal and have more stability than you might expect from a telescope of this size.

From the minute you unbox the Celestron Powerseeker 70AZ you can tell it is a much better telescope than those cheap department store models. Setup is pretty easy and straight forward consisting of a few thumb screws and requiring no tools.

Celestron Powerseeker 70AZ side view

The current model of the Celestron Powerseeker 70AZ comes with an adequate 5x24mm finder scope (just barely), a 20mm eyepiece, a 4mm eyepiece (useless) and a 3x barlow (also useless).

Celestron Powerseeker 70AZ accessories

You are probably wondering why I like the Celestron Powerseeker 70AZ when I use terms like barely adequate and useless when I describe the accessories. Good question.

Virtually every manufacturer of lower end telescopes these days throws in some junk so that their “specifications” are better than the competitor’s, and the Celestron Powerseeker 70AZ is no exception. It is simply a sales tactic and it does not apply to just astronomy equipment. The last time I bought a toaster oven it came with racks and trays I have never had a use for, but it sure looked cool on the box that it came with all this extra stuff. Same thing here.

I don’t really penalize the Celestron Powerseeker 70AZ for doing what everyone else does, particularly since the quality of the scope is high enough for the price that I could simply throw away the 4mm eyepiece and barlow.

In comparison to other telescopes like the Celestron Powerseeker 80eq, the Celestron Powerseeker 70AZ has a longer focal length making it a better choice for close ups of the moon and viewing planets.

Comparing the Celestron Powerseeker 70AZ to something like a Celestron Powerseeker 127eq reflector telescope it does not require near the cool down time (the 127eq has two mirrors which need to acclimate to the outside temperature before use or extremely blurry images could result) and requires no maintenance or adjustments such as the collimation required by the 127eq. The 127eq also requires learning how to use an equatorial telescope mount whereas the alt/az mount on the 70AZ is pretty much intuitive even to children with no experience. This makes the Celestron Powerseeker 70AZ a better choice for kids and first time telescope users.

Using the scope

Where the Celestron Powerseeker 70AZ shines is actually using the telescope. With the alt/az mount there is nothing to learn, point it at something and look through the eyepiece, simple as that. 

The optics in this little scope are surprisingly good. No, they are not as good as say a $350 Orion Astroview 90mm refractor, but then again they are close enough to ignore considering how much cheaper they are. Images of the moon are very impressive although I would really like to have a moon filter (stay away from Celestron’s own moon filter) to make viewing a little more comfortable.

Saturn and Jupiter are clearly identifiable and a joy to watch, as is the Orion nebula and Andromeda galaxy. From there it is a mixed bag with objects such as the Pleadies being easy to see and pretty spectacular, The Lagoon and Eagle nebulae are quite pleasing but require a bit more effort, while the Ring and Dumbbell nebulae are virtually impossible to get any enjoyment out of with the Celestron Powerseeker 70AZ beyond finding them.

To some extent this can be improved with a couple of better eyepieces but I personally would probably suggest moving to a nicer telescope such as the previously mentioned Orion Astroview 90mm refractor if you find you outgrow the Celestron Powerseeker 70AZ and still want more.

I was originally a little concerned about the plastic rack and pinion focuser but after using it a few times it has proven to be remarkably smooth and tight, allowing virtually no play but still being easy to use. I think that the light weight of the diagonal and eyepiece along with the relatively small size of the telescope tube allows plastic to work well here whereas it would not in a larger telescope.

Speaking of the diagonal, the Celestron Powerseeker 70AZ comes with one made of plastic and a little unusual. Where most diagonals are angled the one included with the Celestron Powerseeker 70AZ is more of a ball shape with two tubes coming out. It also seems to be much more enclosed than a standard diagonal which should help keep dust, dirt and dew out of it over time.

 I am not really a fan of the finder but it serves it’s purpose fairly well. Like all finders, be sure you set it up during the day using a far away object such as the top of a telephone pole, water tower antenna, etc. Once it is adjusted it is acceptable. Of course, no telescope in this price range has a good finder because that would take money away from making the actual telescope better and we do not want that. You can do without a finder, but a terrible quality main telescope will just make the whole thing a waste of money, and the Celestron Powerseeker 70AZ is certainly not a waste.

Final thoughts

You will be hard pressed to find a better first telescope for a beginning astronomer. I really like to recommend the Celestron Powerseeker 70AZ because it is inexpensive, light weight, breaks down and stores small, requires no maintenance and provides more than adequate views of the most popular objects in the night sky. 


Share this post! Facebooktwitterredditpinterestlinkedintumblrmail